My new dress shirt
2 days ago I finished a dressy shirt, and then I spent the next 24h period ish, in between taking care of a baby, trying to fix the images so they would download onto the app.
Unfortunately, because 2 days ago is also the day I decided to start this blog, I don’t have a lot of my process recorded. However, I thought it would be fun to share what I’ve done.
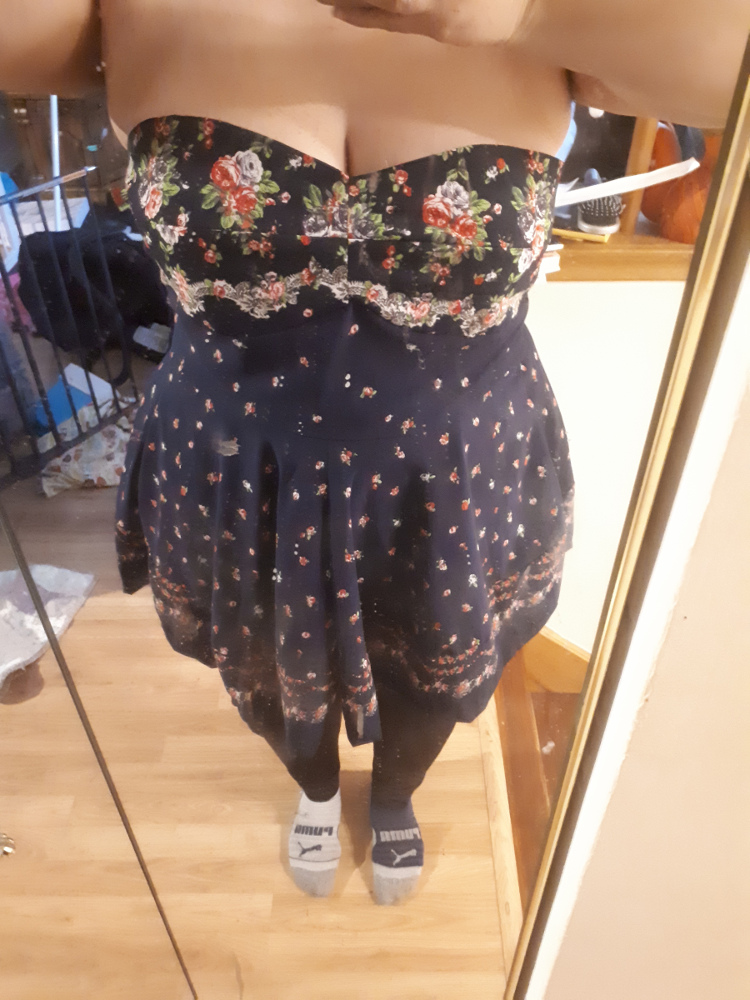
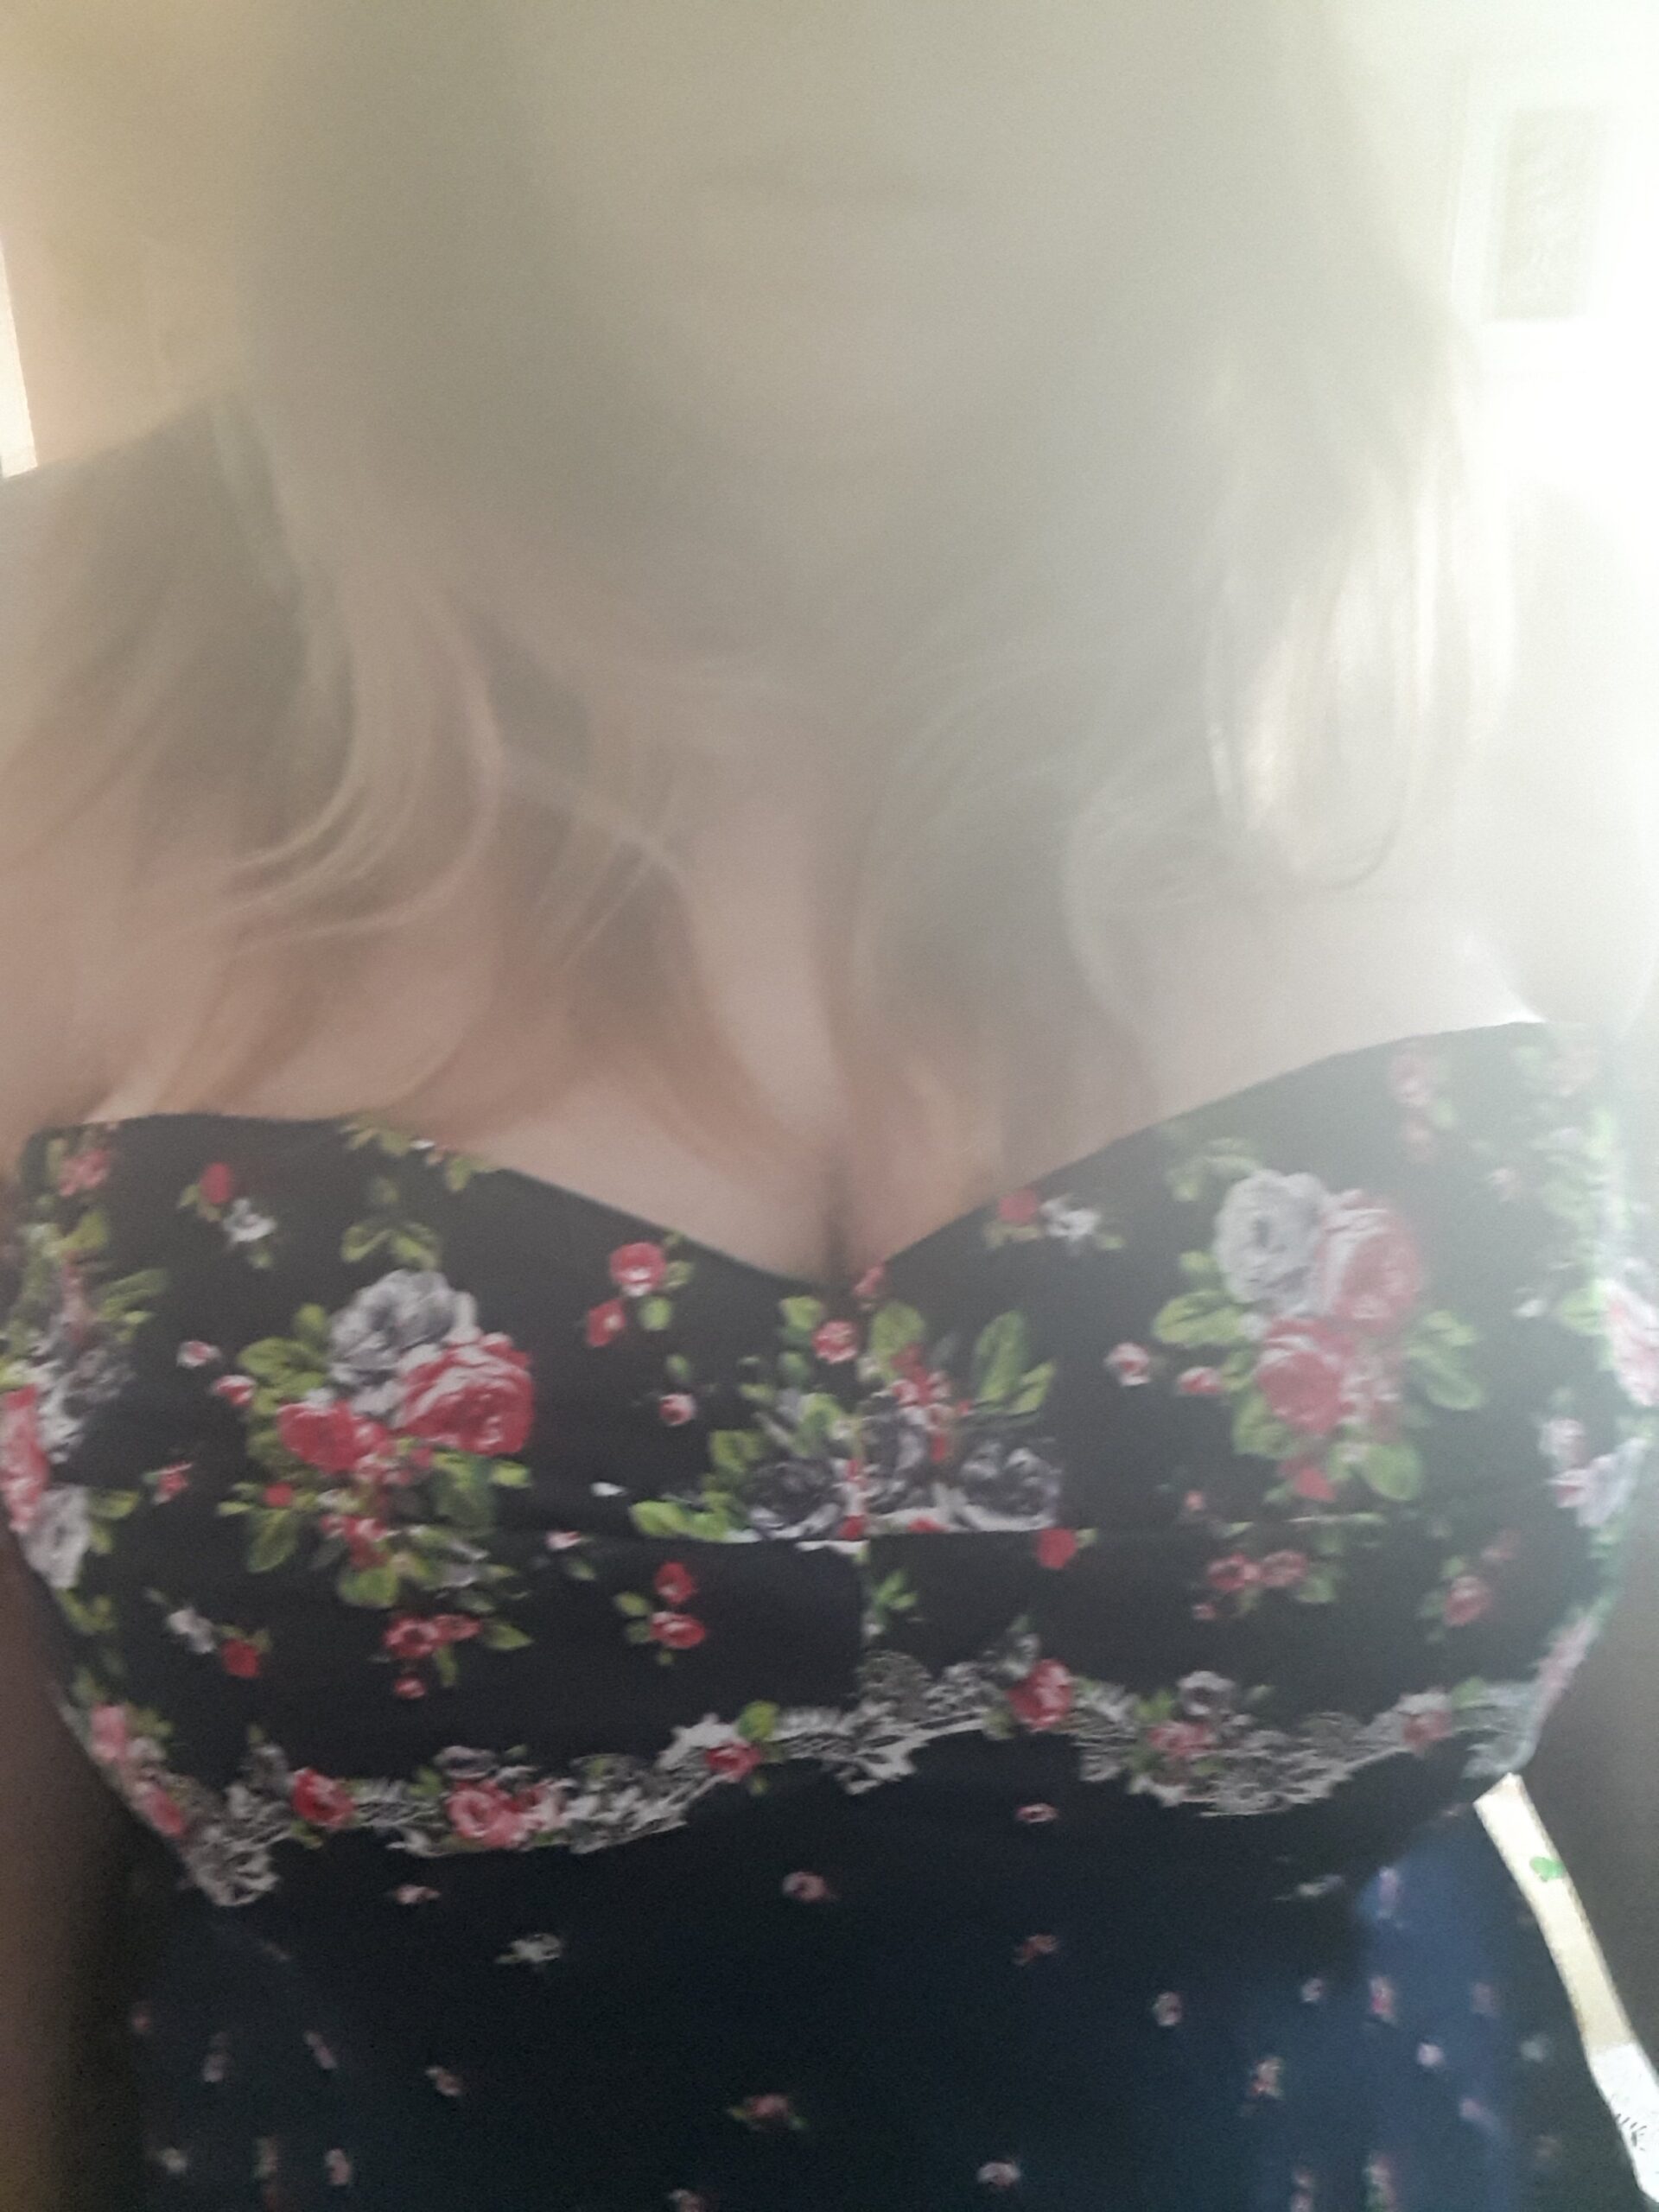
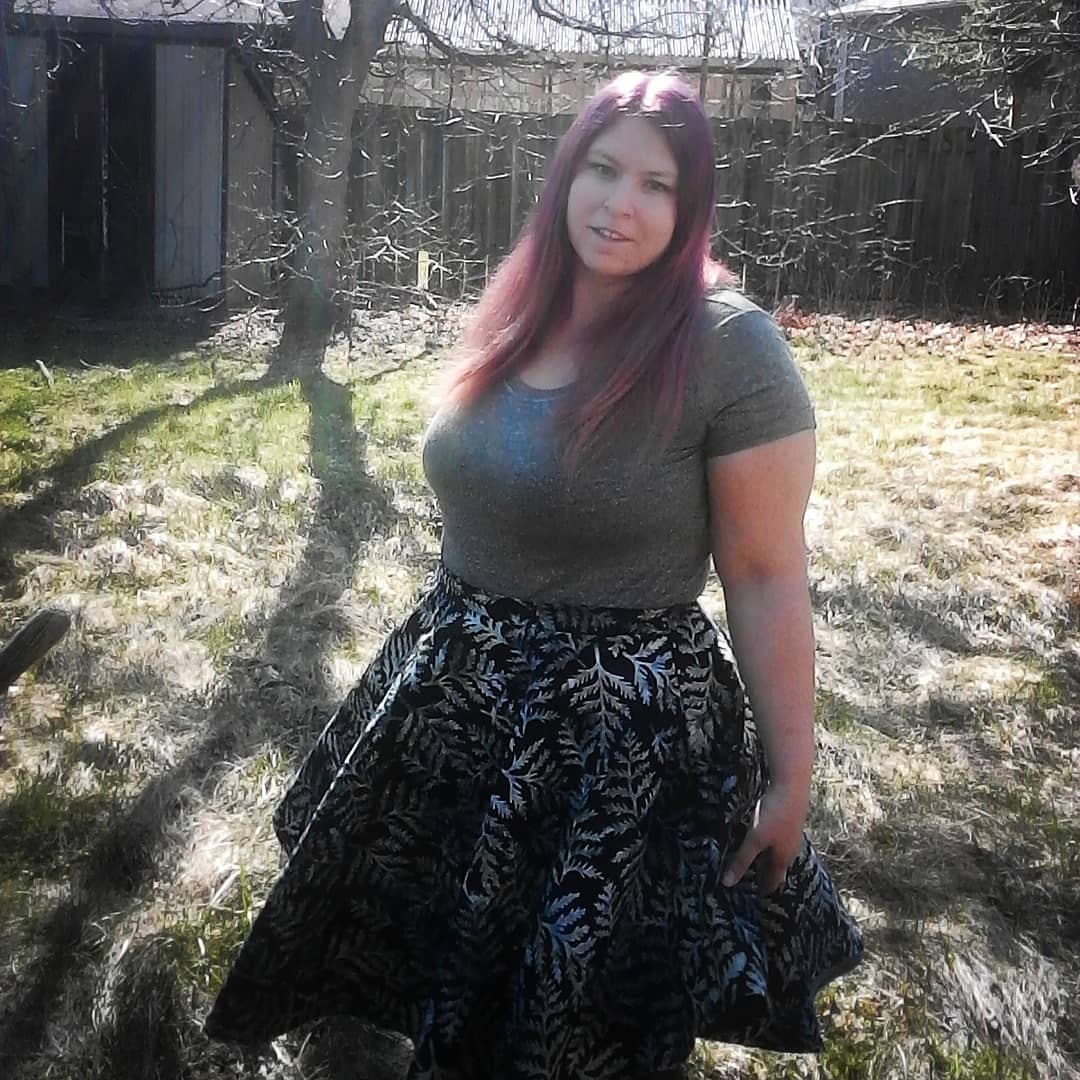
I started this dresssy shirt with a pretty basic pattern/design I’ve used before. I’ve used the pattern/design to make the top part of dress once, where the bottom was a simple circle skirt. See my post here (insert post link, after post is written). It’s one of my favourite outfits, so I thought I’d try the same design again. However, as the skirts on that style of top are always too short, in my opinion, I wanted to modify it slightly to make it longer.
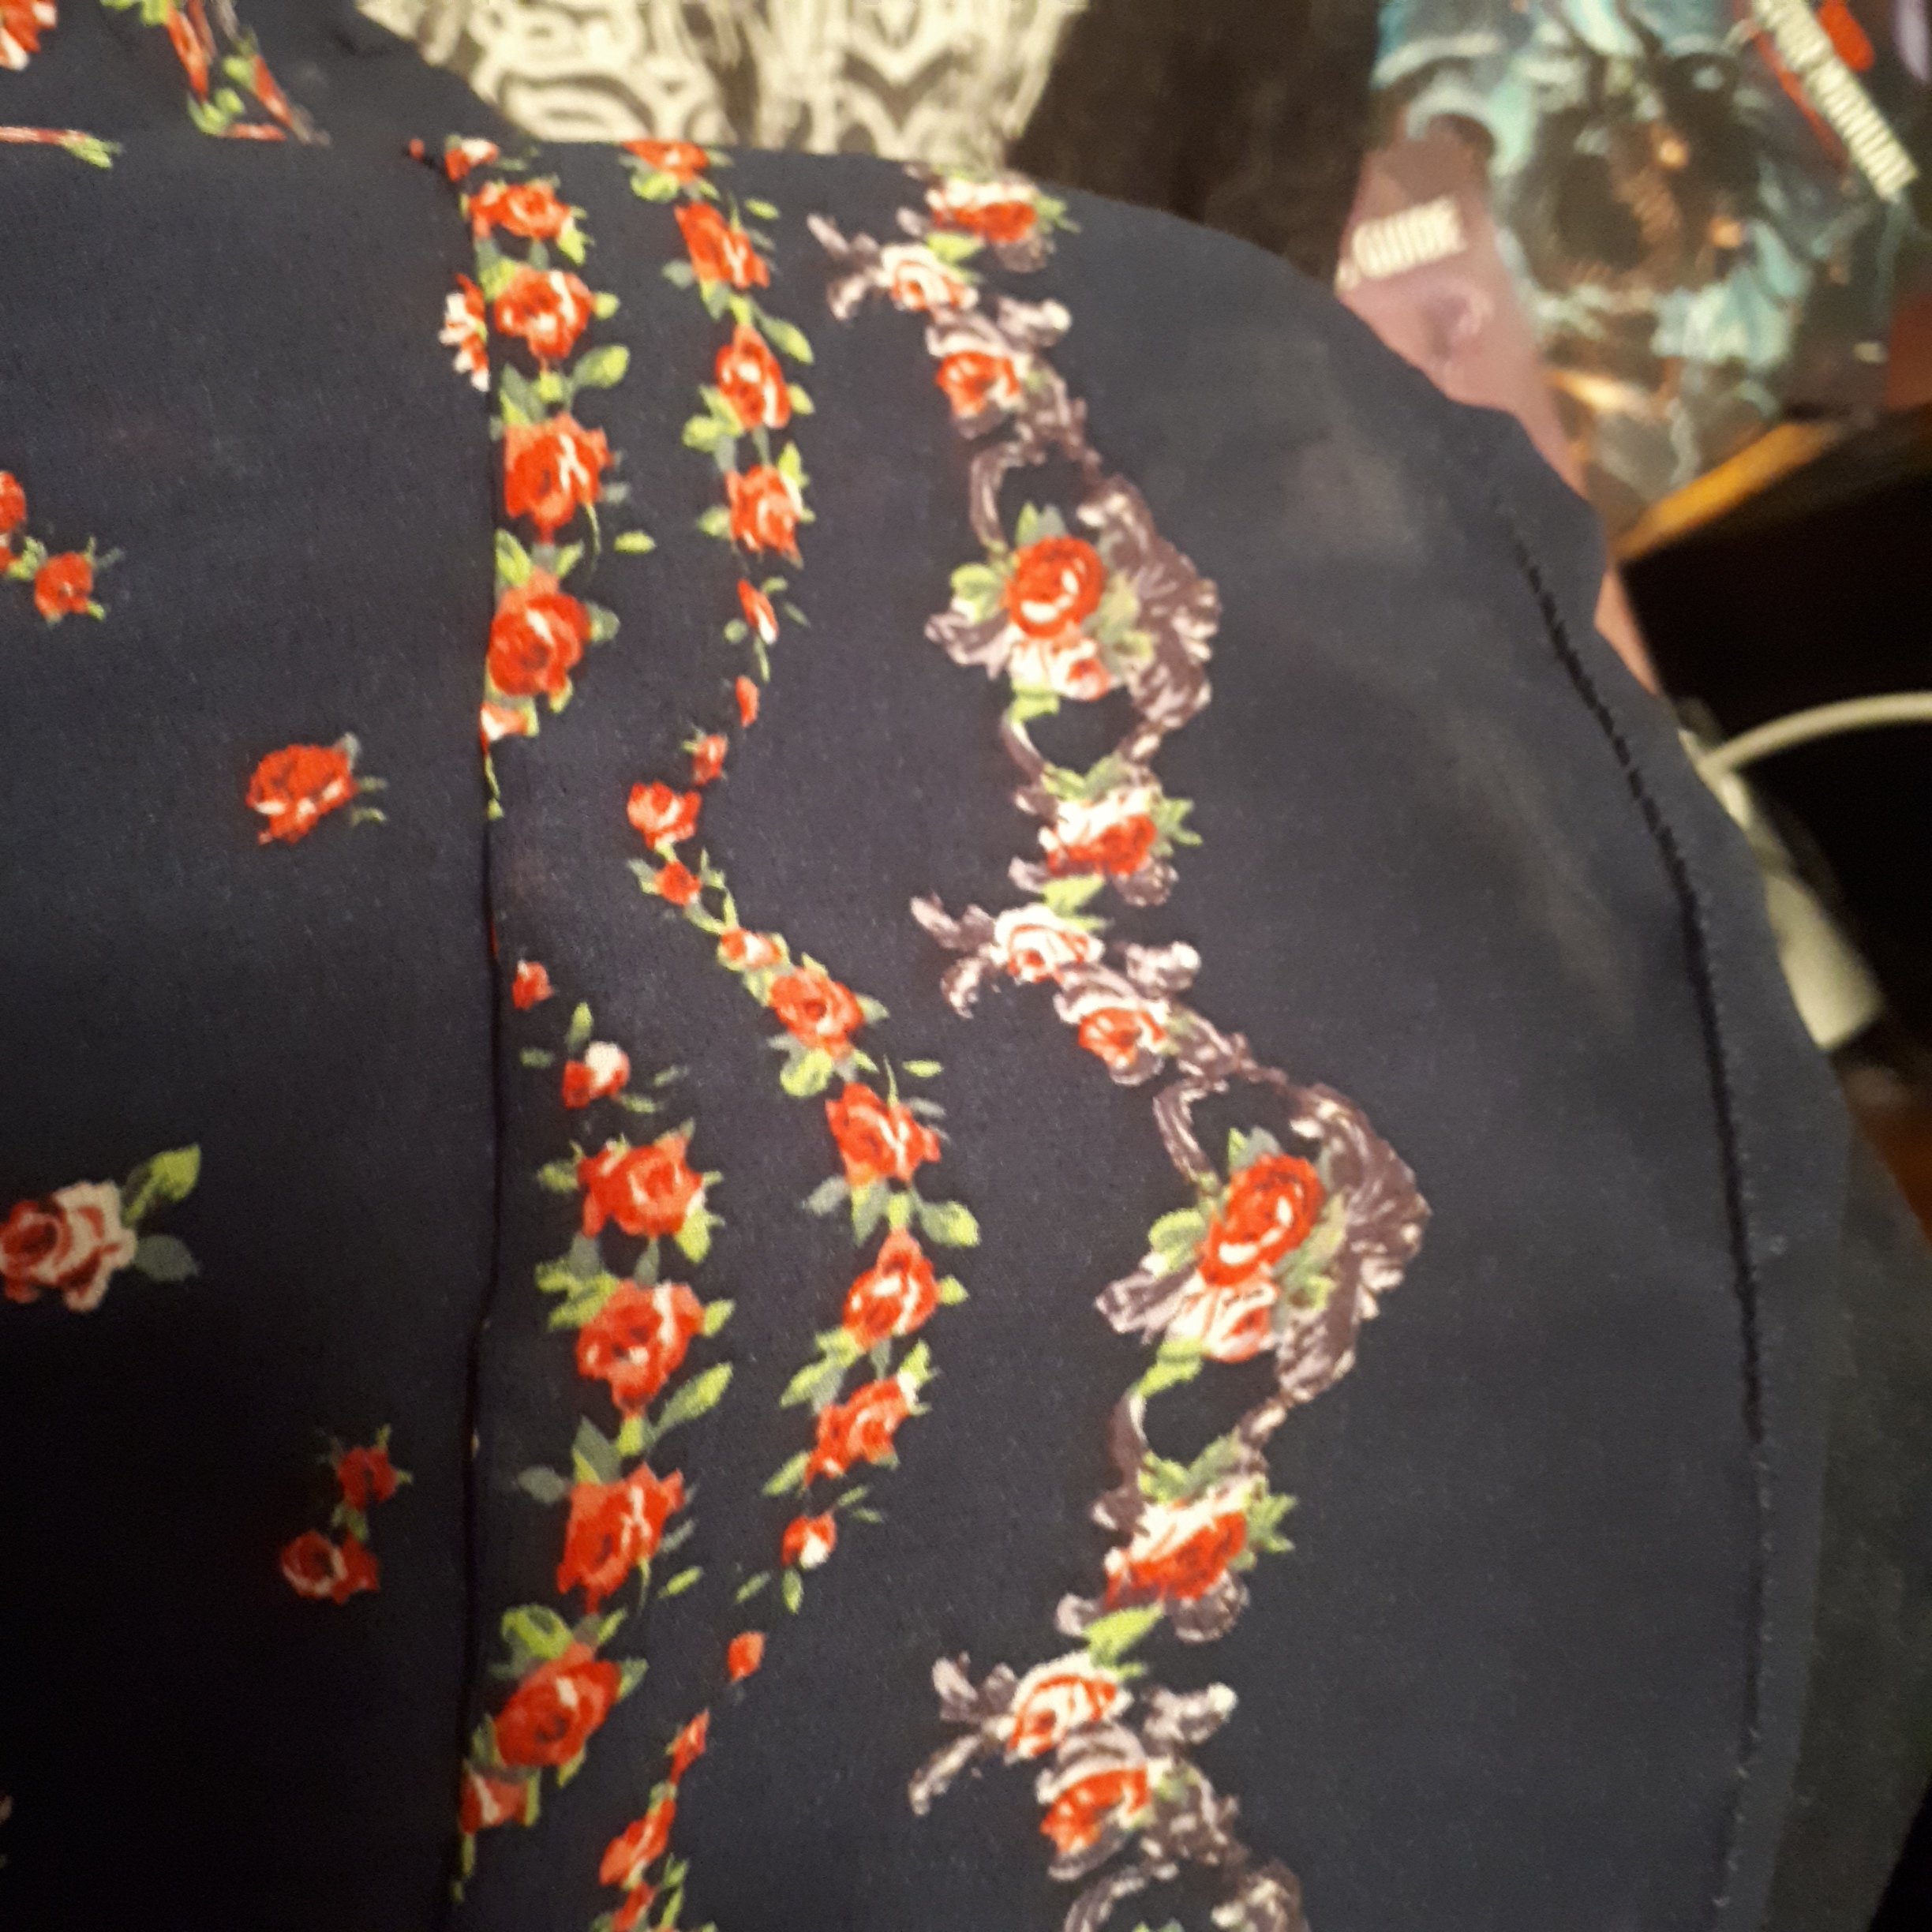
I have had this fabric in my drawer for ages that I didn’t know what to do with. The main difficulty I had with it was the various types of patterning on it, and the fact that the patterns spanned across the fabric in straight lines. I wanted to preserve the beauty of the fabric but also make something flowy with it. I wasn’t sure how to do both, as I’m still relatively new at sewing, but as it’s been sitting there for ages I thought this was as good an opportunity as ever.
I decided to split the patterns on the fabric into 3 sections of the design I had in mind. The bodice would have the medium-sized, more intricate fabric pattern. The middle skirt would have the largest fabric design that had a more basic pattern that could flair out (as flairs need to be cut on a curve). On the bottom I wanted to attach the final fabric pattern, which would need to be a straight cut along, and so I just added it to the flaired portion of the design because I had quite a length of fabric that I could use.
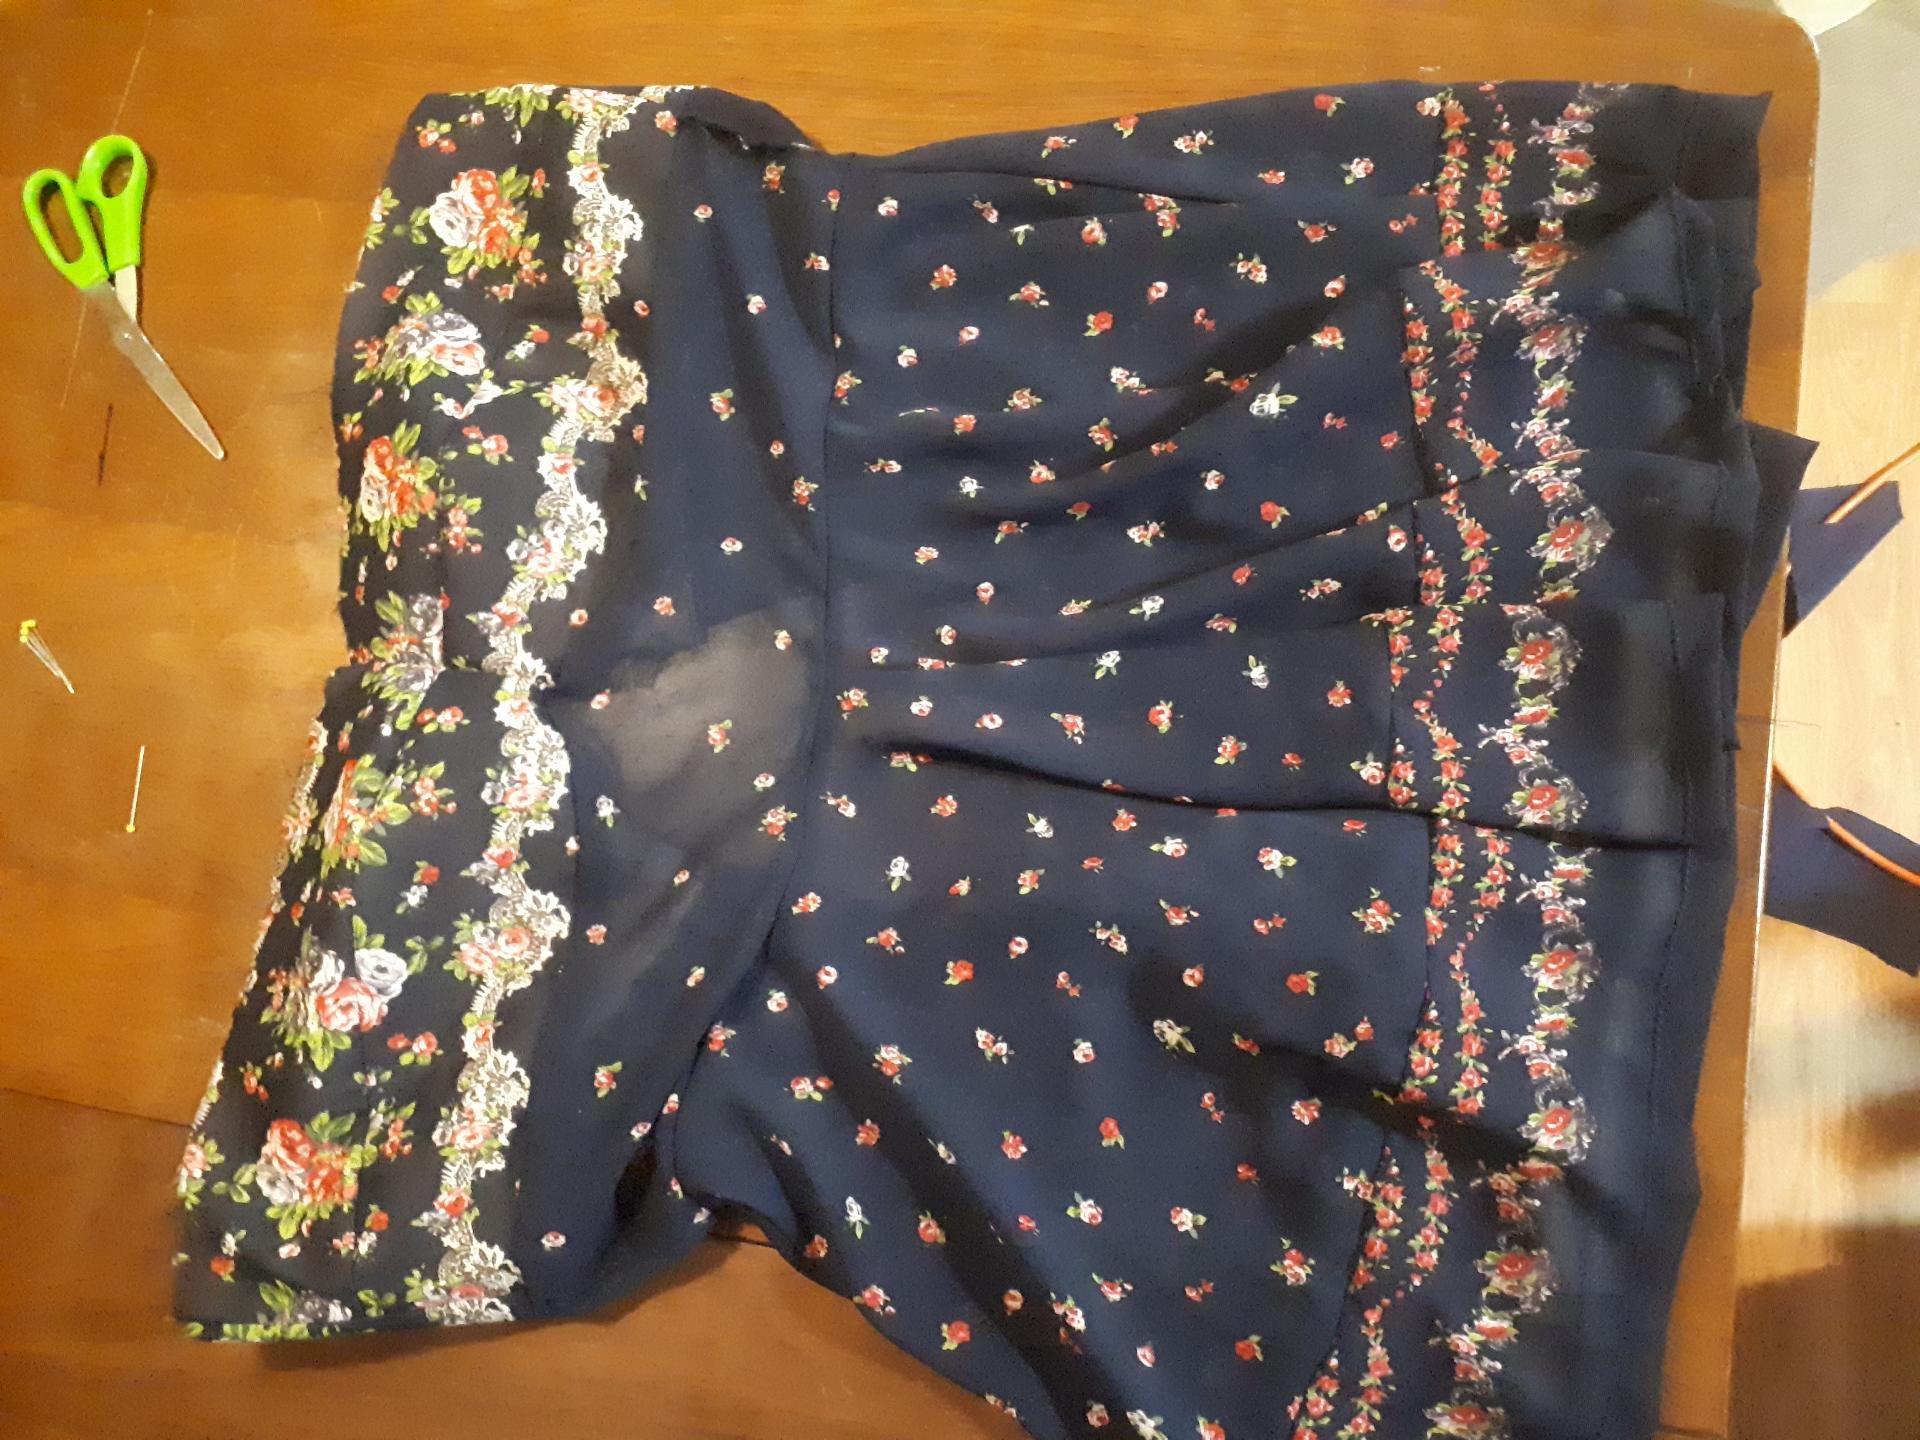
As the fabric was very light in weight and dark in colour, I was able to make minor mistakes that are basically completely unnoticeable (such as sewing the seam on the wrong side of the fabric). Which is great! I hate seam ripping light fabrics.
I really did do a lot of process in this, but as I didn’t record the majority of it, it’s a bit difficult to go over everything I did and how I messed up/fixed it. I am really pleased with the finished product though! It looks basically how I envisioned it, and I was even able to do a proper lining of both the bodice and the skirt.

One Comment
Rachelle
Beautiful top!! I can totally relate to wanting longer shirts than the ready to wear ones.